Welcome to coines.io - the world’s leading crypto exchange.
Let’s get started in 5 quick and easy steps:
- Step 1: Register Account
- Step 2: Deposit Crypto
- Step 3: Buy Crypto
- Step 4: Explore Coines.io Products
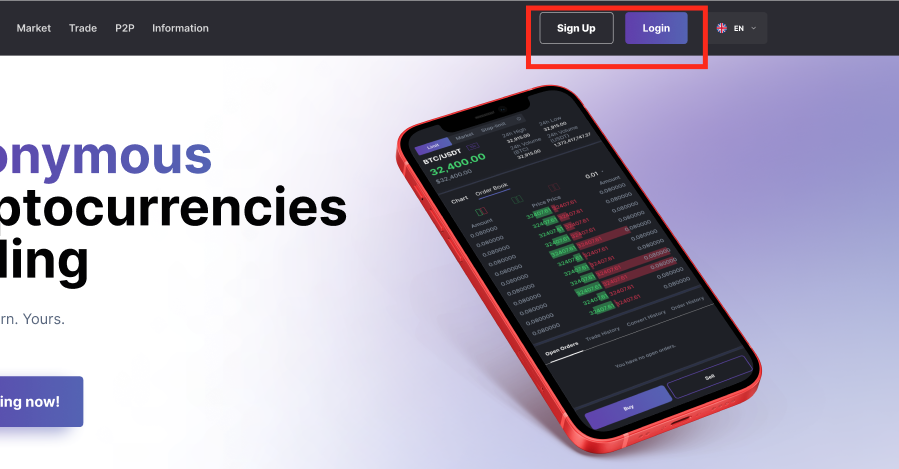
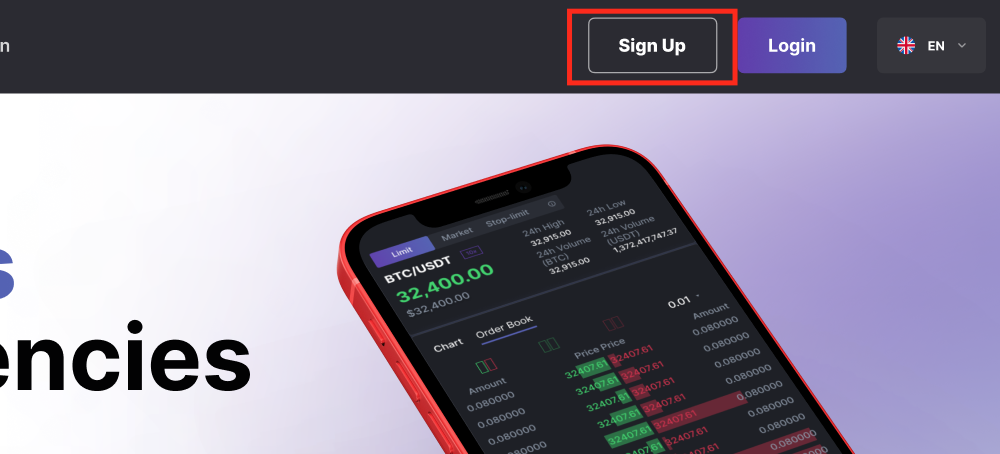
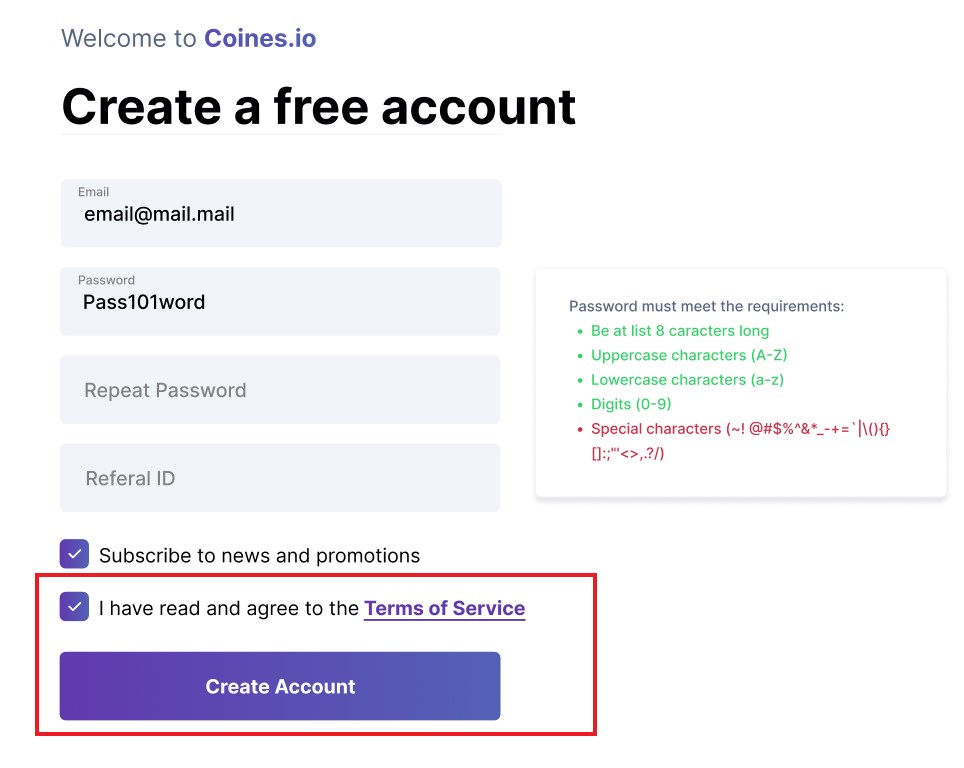
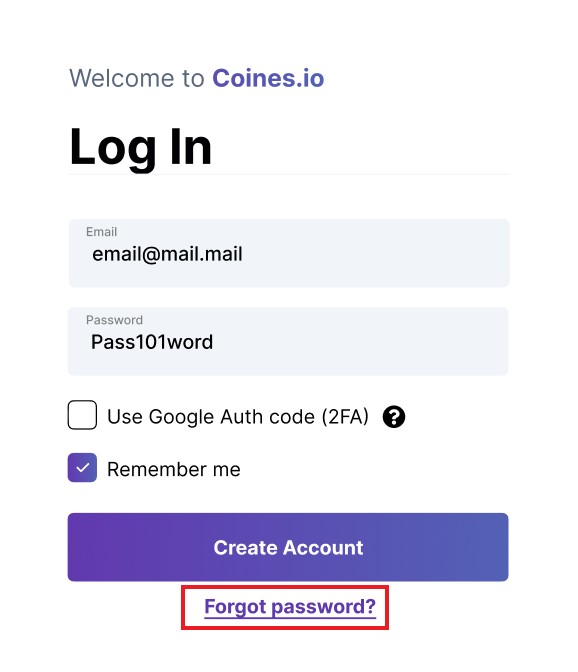
Step 1: Register Account
Register a Coines.io account with your email.
Step 2: Deposit Crypto
If you already store cryptocurrency in another wallet, you can deposit them into your Coines.io wallet. Please refer to the FAQ section for more information on how to deposit and withdraw cryptocurrency to your Coines.io account.
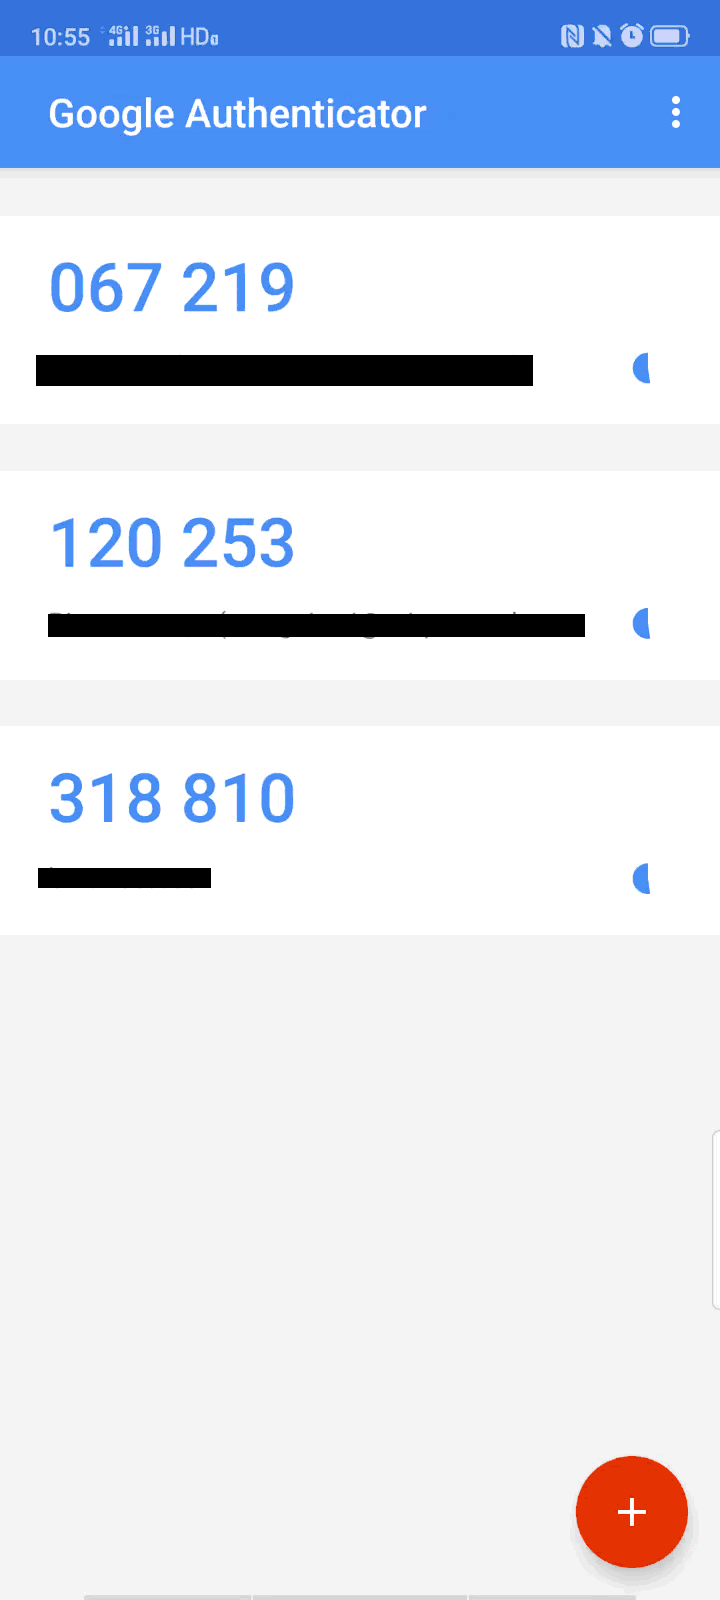
Please note that you should never share your Coines.io Account/Wallet passwords, private keys, or 2FA codes with anyone. Coines.io will never ask you to disclose sensitive information.
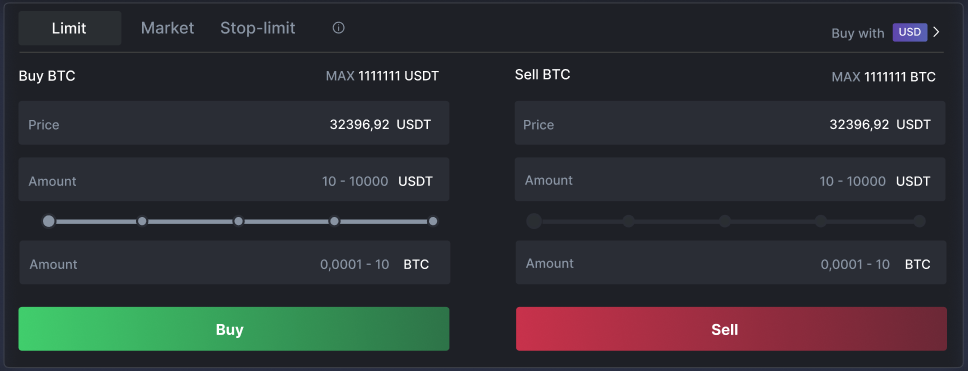
Step 3: Buy Crypto
Buy Crypto Using P2P (Peer-to-Peer)
You can buy crypto with P2P methods, too. This allows you to buy crypto from other crypto enthusiasts like you directly.
Step 4: Explore Coines.io Products
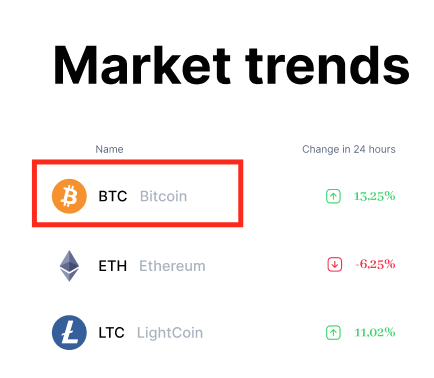
Spot Trading
After getting your first crypto, you can start exploring our versatile trading products. In the Spot market, you can trade hundreds of crypto.
The Coines.io trading interface contains a robust set of tools and options to help you in your trading analysis. These include:
- Candlestick charts
- Depth charts
- Time intervals
- Drawing tools
- Technical indicators
TradingView allows users to create a customized toolset for technical analysis. Let’s see how to use it on Coines.io.
Opening TradingView
The TradingView and trading tools are accessible in both the Classic and Advanced versions of our UI. These two views offer different, editable UI layouts and are switchable at any time.
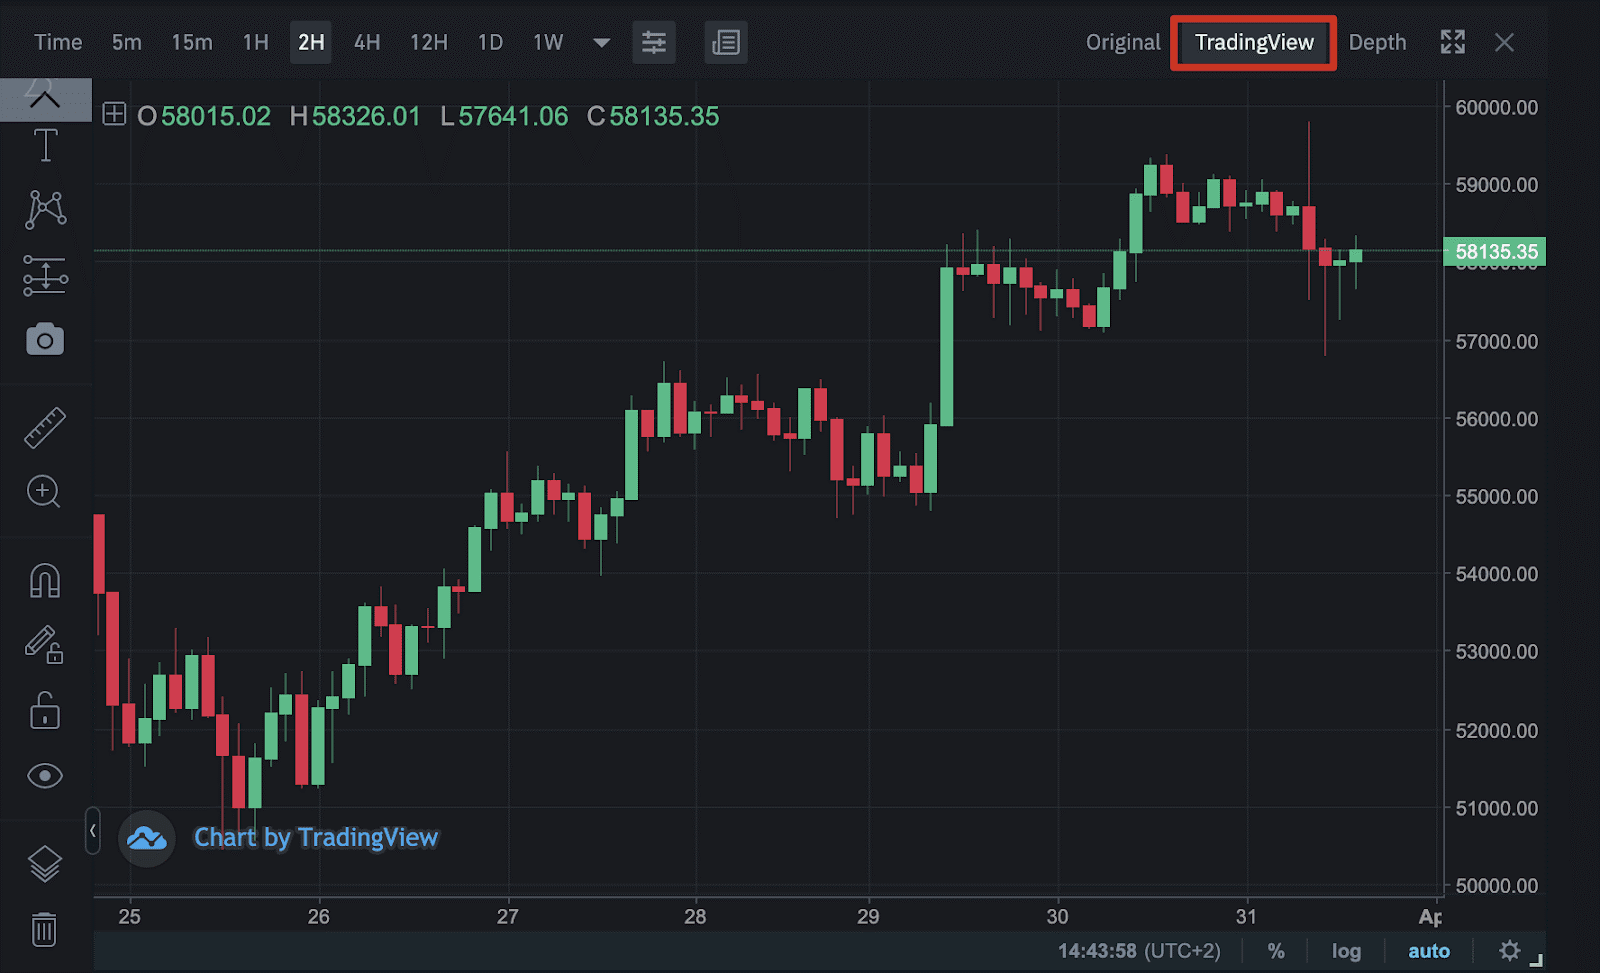
Log in to your account and click the [Trade] button.
-
Click [TradingView] above the chart to gain full access to the trading tools available and candlestick charts.
You can access their settings by clicking the [Settings] icon in the red square shown below. Each moving average is adjusted according to the specified time frame. For example, MA(7) is the moving average over seven candles of your time interval (e..g, 7 hours if you are using a 1H chart or 7 days if it’s a 1D chart).
- MA(7) - Purple
- MA(25) - Red
- MA(99) - Cyan
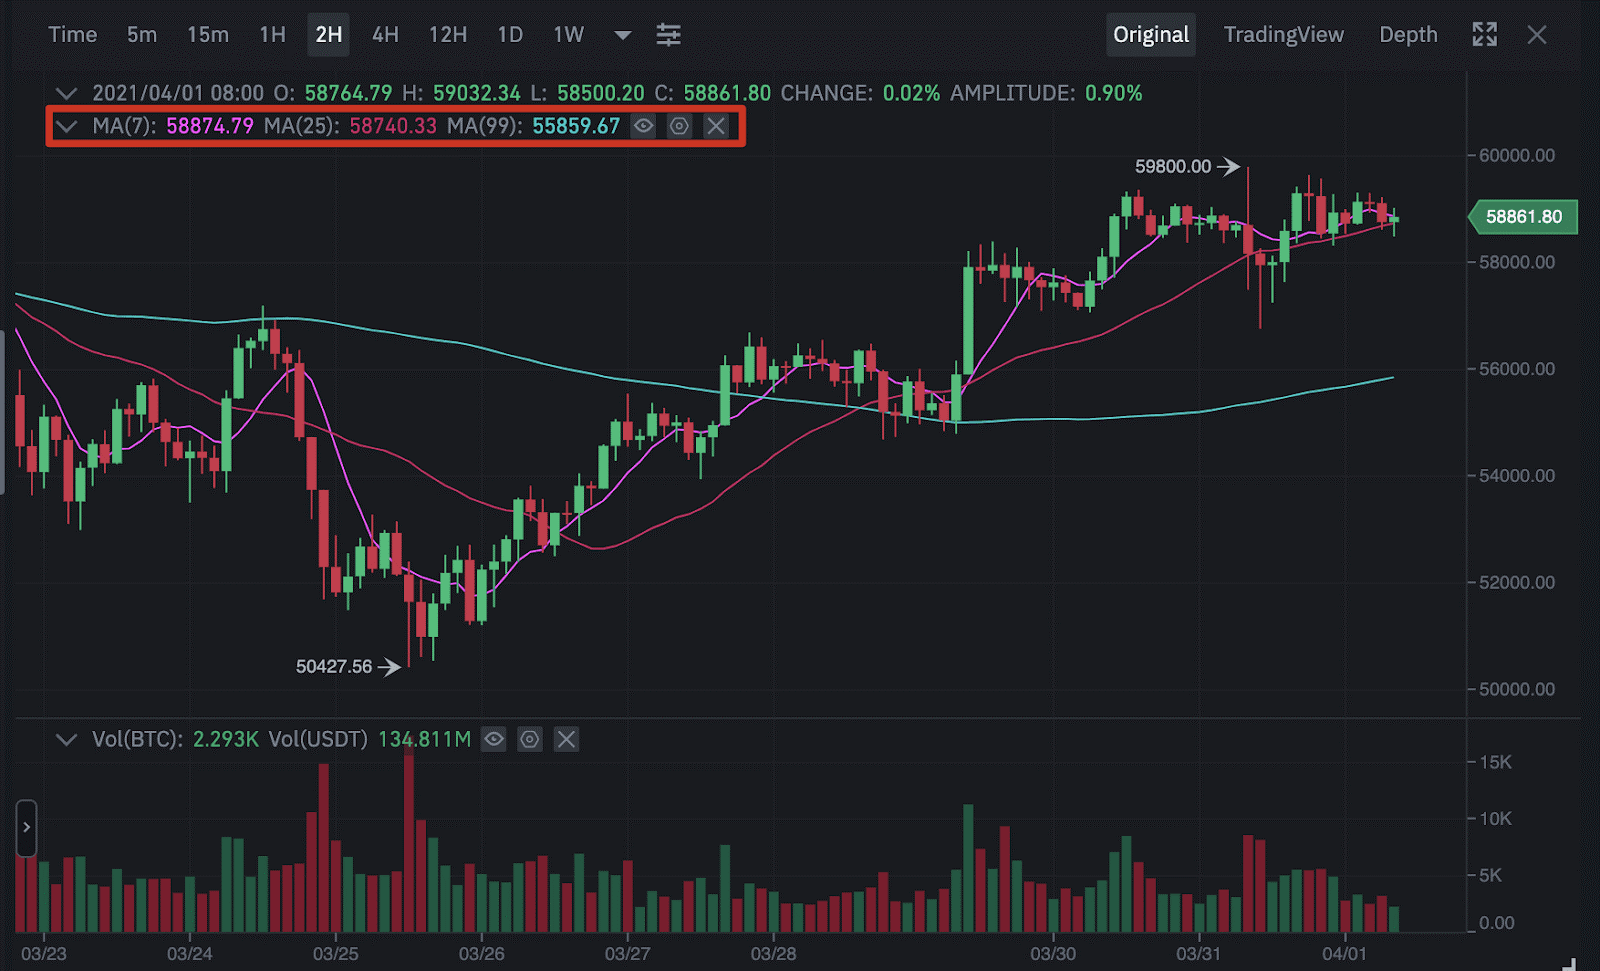
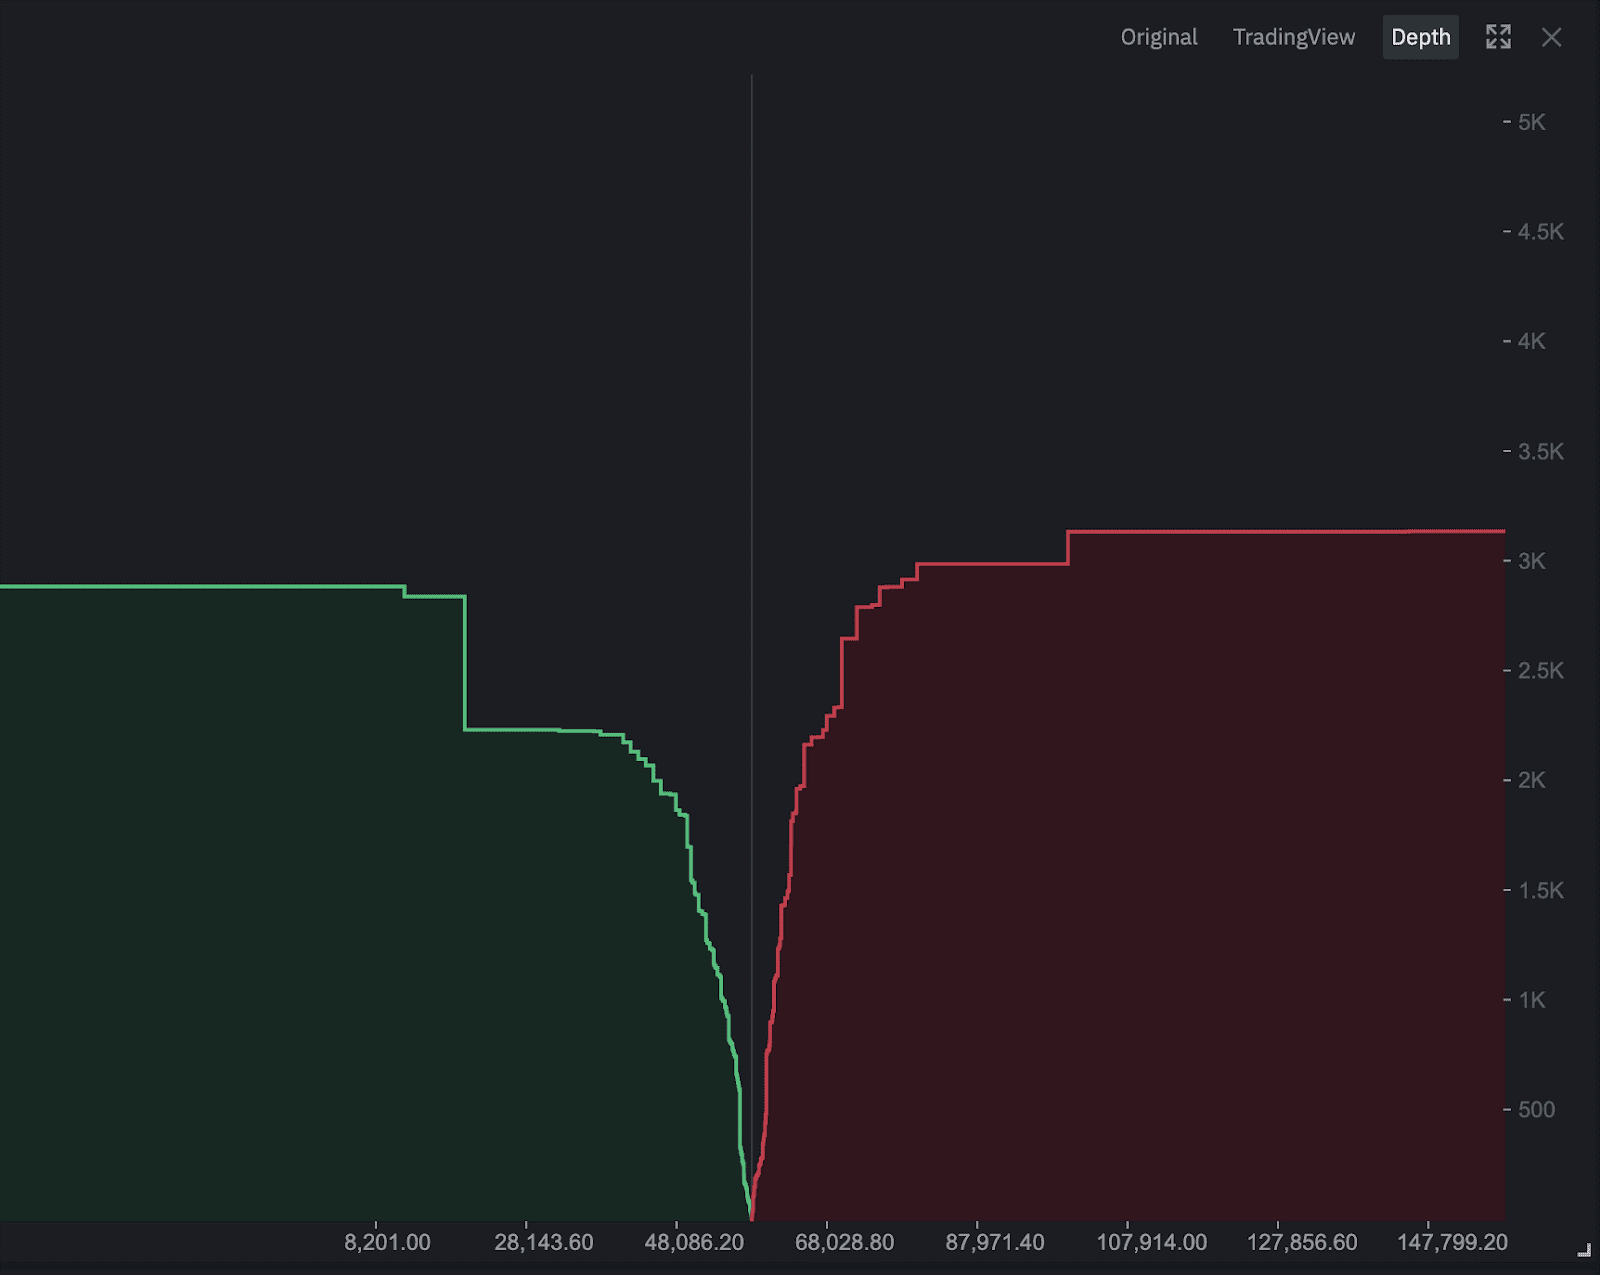
[Depth] provides a visual representation of unfilled buy/sell orders on the order book.
Candlestick Charts
Candlestick charts are a graphical representation of an asset's price movement.Each candlestick's timeframe is customizable and can represent a specific period.
To customize your candlestick chart, double-click on any of the candles in [TradingView] to bring up its settings.
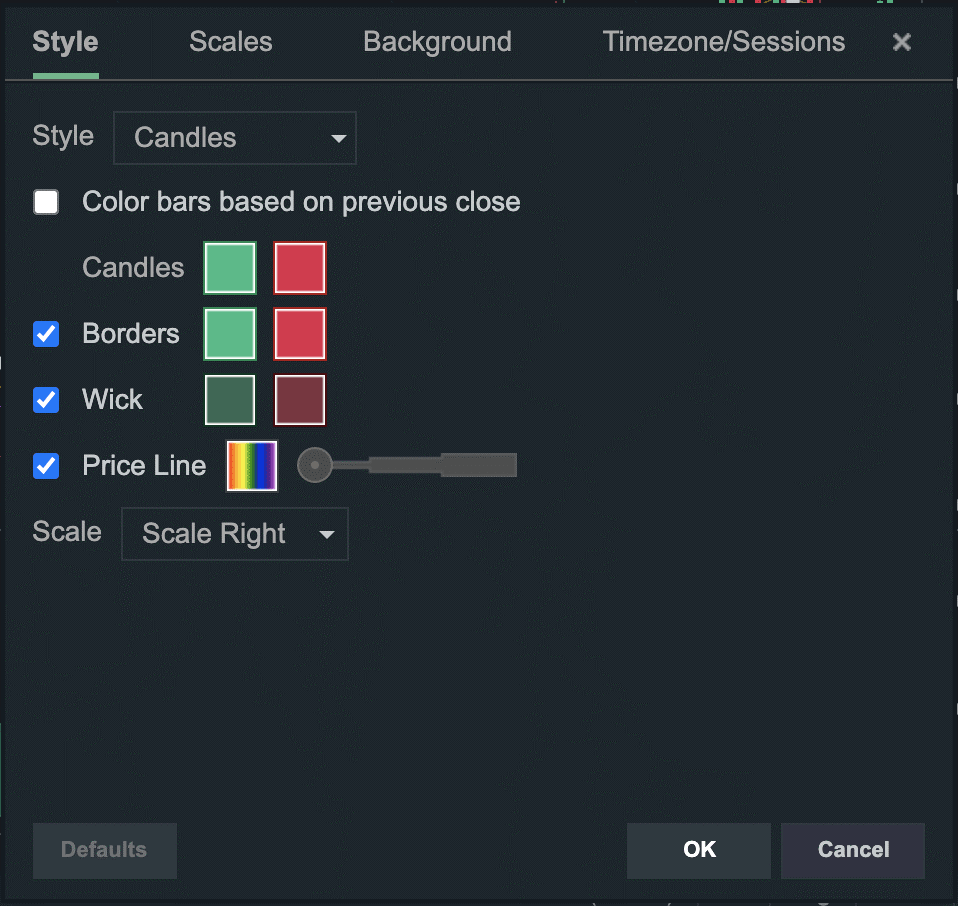
- [Style] allows you to change the way your candlesticks look.
- [Scales] gives numerous options for the scaling and margin of your candlesticks, including Auto Scale, Log Scale, and Percentage Scale.
- [Background] provides options for changing the look of the candlestick chart’s background.
- [Timezone/Sessions] allows you to choose your timezone.
Candlestick Intervals
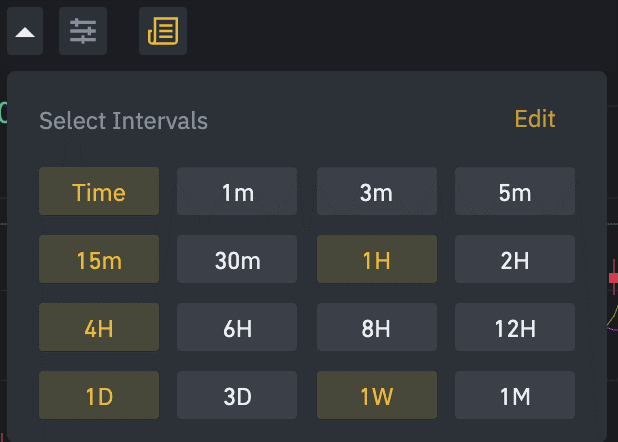
The timeframe represented by each candlestick is alterable by selecting one of the default options above the graph. If you require more intervals, click the downward-facing arrow on the right-hand side.

Here you can select a new interval or press the [Edit] button to add more intervals to your default options.
Drawing tools
The left-hand side of the chart provides several drawing tools and options to help with your charting analysis. You can also right-click each tool to find variations of the tool’s primary function.
The default selection contains the following tools:
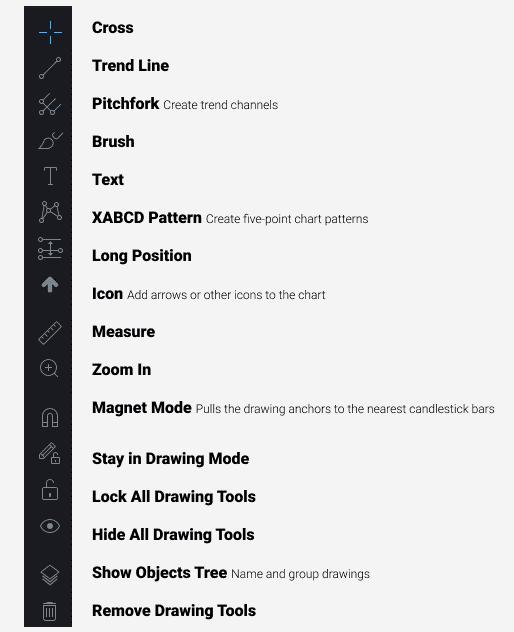
Popular Basic Tools
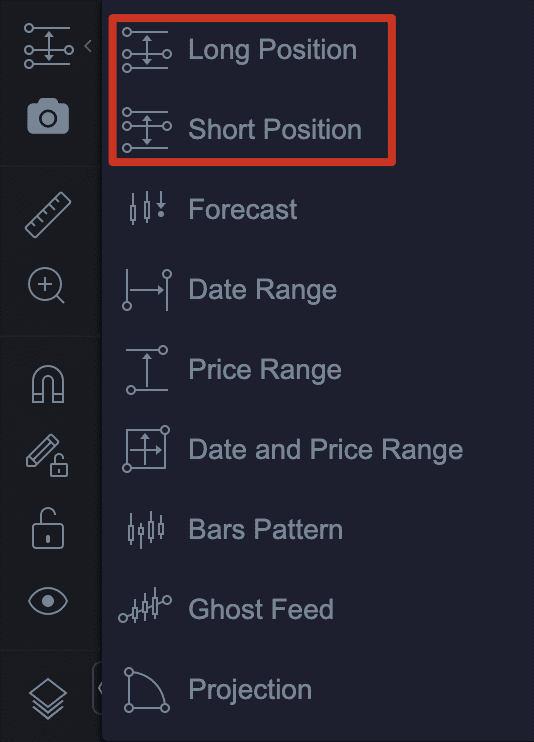
Long/short position
The long or short position tool allows you to track or simulate a trading position. You can manually adjust the Entry Price, Take Profit, and Stop-Loss levels.
-
Select either the [Long Position] or [Short Position] tool.
-
Click on the graph to create your long/short position. The green shaded area represents your target (potential profit), whereas the red shows your stop-loss area (potential loss). At the center, you can see the risk/reward ratio.
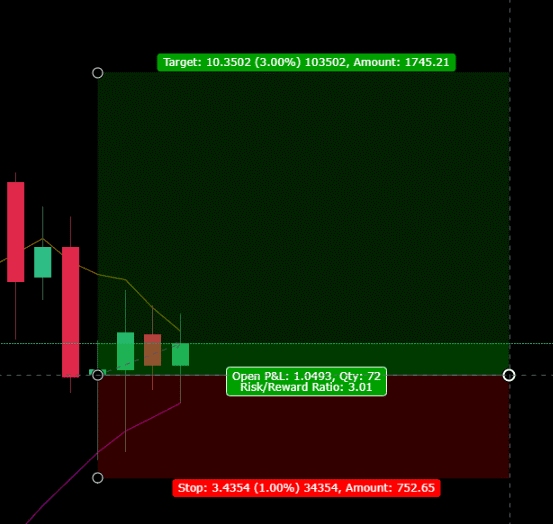
-
Drag the borders of the box to change your Risk/Reward Ratio. Target shows the difference in price between your Entry Price and the Take Profit level. Stop shows the price difference between your entry price and Stop-Loss level.
Double-click the Long Position/Short Position chart to adjust its settings. You can change the investment amount under [Account Size] along with your percentage risk. [Coordinates] allows you to change your Take Profit, Entry Price, and Stop Level numerically, while [Visibility] offers graphical customization.

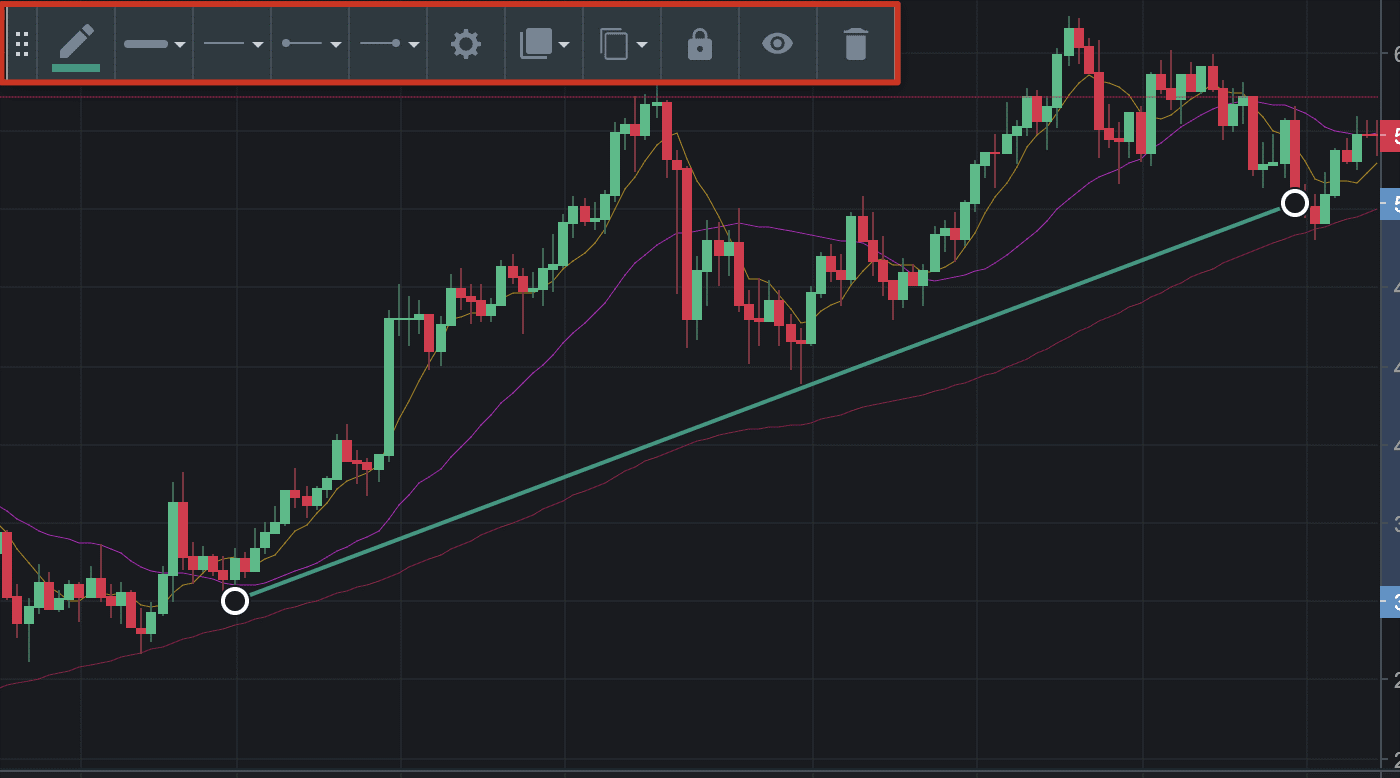
Trend line
To create trend lines, simply click the [Trend Line] tool and select the beginning and endpoints for your trend line.
Below is an example of a simple trendline demonstrating possible market entry points. Thickness, color, and other features are customizable using the floating toolbox.
Technical Indicators
Technical indicators, such as Moving Average or Bollinger Bands, are addable in the trading view.
Click the [Technical Indicator] icon for a list of all available options.
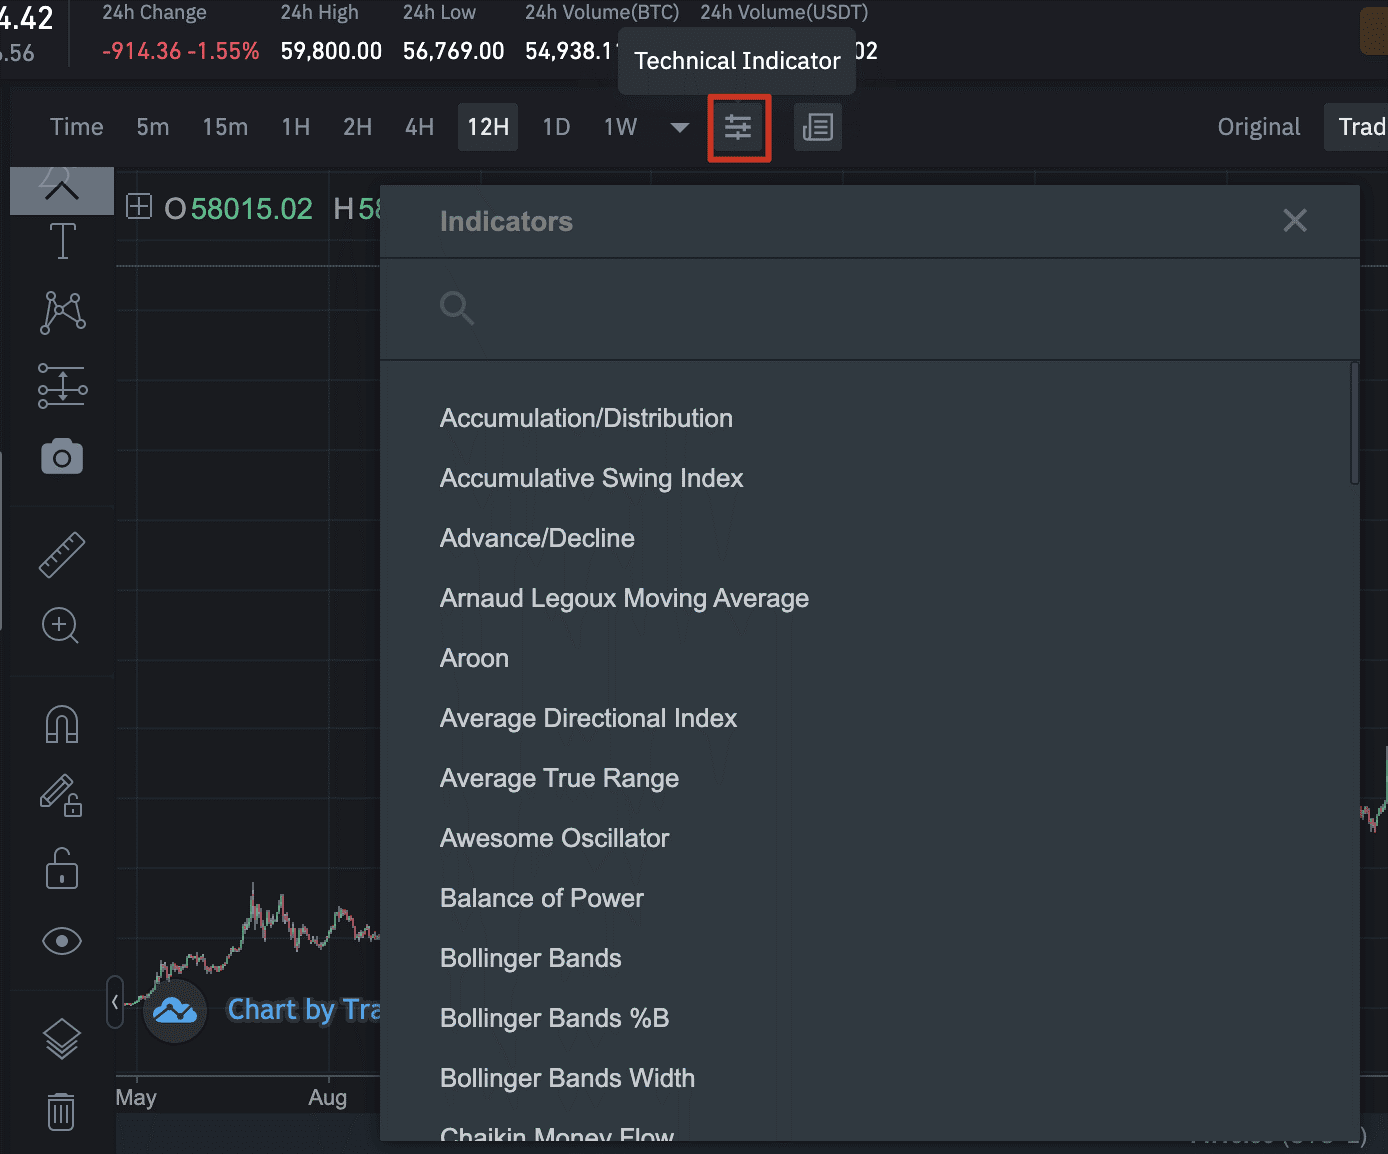
Once you have chosen a technical indicator, it becomes visible on the candlestick chart.
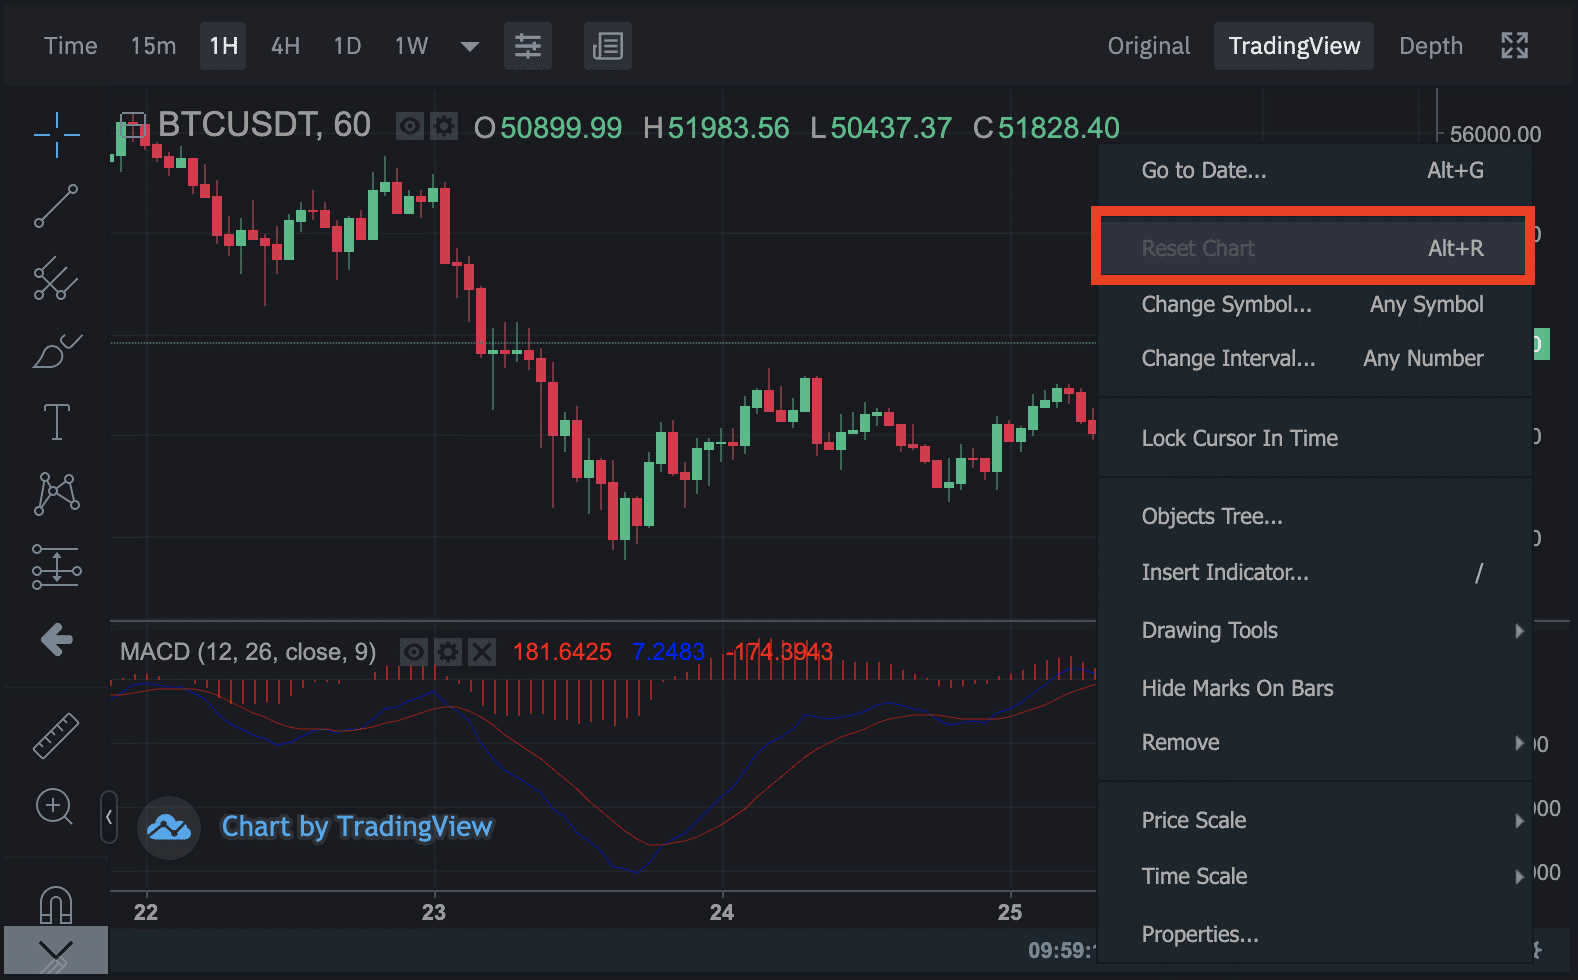
How to reset the chart
To remove the technical indicators, simply click on it to bring up the floating toolbox, then click on the bin icon.
If you want to reset the whole chart, right-click anywhere on the chart and click [Reset Chart], or press [Alt + R] on your keyboard.
Here are all the basics for you to get started. Start using TradingView tools on Coines.io for your technical analysis today.
If you encounter issues while using Coines.io services, you can search for solutions on the Coines.io Live Chat. The AI bot will suggest solutions based on the information you provide. You can also search for answers on the Coines.io FAQ page; If you still can't find a solution, please contact the CS team via Coines.io Live Chat.
If you are not sure how to use the Coines.io Live Chat and Support, please follow the instructions below.
-
Log in to your Coines.io account and click on [Support] on the bottom right to start the chat.
You can also access it from [Profile] - [Chat] on the Coines.io App.
You can find the answers to your question by:
- Browsing through the list of FAQ articles matched by the system;
- Submitting your question in the Chat window.
Please state your question as detailed as possible and provide the relevant supporting documents, e.g. screenshots, so that the Coines.io support team can better assist you and handle your question.
You may leave the chat window anytime after submitting your question. You will be notified once a CS agent is assigned to your case. To keep your conversation open with CS, please reply to the thread within 24 hours. If you respond within 24 hrs, you can maintain your queue position, which keeps you ahead of the queue.
If CS can’t handle your question and the conversation is marked as “Solved”, you may reply to the thread to submit your question again.
Note:
Due to the large number of inquiries Coines.io receives every day, we might not be able to reply in your preferred language. In this case, CS will reply in English in order to address your issues as soon as possible. You may use online translating tools to translate the reply to your preferred language.
If Coines.io Helpdesk does not support your local language, please click on [Language] - [English] and submit your question in English.
Convert is a service where users can transform the cryptocurrency they hold into another cryptocurrency, in a matter of seconds. Coines.io Convert also powers the Convert function of the Coines.io.
It takes just four simple steps, all of which can be completed in seconds, to complete a crypto deal on Coines.io Convert.
Step 1: Go to Coines.io Convert.
- On the Coines.io website, go to [Wallets] on the top left part of the homepage, then choose [Convert].

Step 2: Select the token you have and the token you want to buy. You can choose to enter the number of tokens you want to use (at the top part) or the number of tokens you want to gain (at the bottom part).
Step 3: Click Preview Conversion. You will then see the price quote for the transaction you’re considering. You have 3 seconds to approve the quote shown to you and fulfill the deal. If the 3 seconds expire, click Refresh to get a new rate.
Step 4: Click Convert. The transaction takes less than a second, and you’ll see the crypto you bought in your Spot Wallet.
1. Trading fees.
Current commission for trades:
| Pair | Side | Taker | Maker |
|---|---|---|---|
| LTC / BTC | Buy | 0.01% | 0.01% |
| LTC / BTC | Sell | 0.01% | 0.01% |
| DOGE / BTC | Buy | 0.01% | 0.01% |
| DOGE / BTC | Sell | 0.01% | 0.01% |
| ETH / BTC | Buy | 0.01% | 0.01% |
| ETH / BTC | Sell | 0.01% | 0.01% |
| BTC / USDT | Buy | 0.01% | 0.01% |
| BTC / USDT | Sell | 0.01% | 0.01% |
| LTC / USDT | Buy | 0.01% | 0.01% |
| LTC / USDT | Sell | 0.01% | 0.01% |
| DOGE / USDT | Buy | 0.01% | 0.01% |
| DOGE / USDT | Sell | 0.01% | 0.01% |
| ETH / USDT | Buy | 0.01% | 0.01% |
| ETH / USDT | Sell | 0.01% | 0.01% |
| XRP / USDT | Buy | 0.01% | 0.01% |
| XRP / USDT | Sell | 0.01% | 0.01% |
| CCT / BTC | Buy | 0.01% | 0.01% |
| CCT / BTC | Sell | 0.01% | 0.01% |
| CCT / USDT | Buy | 0.01% | 0.01% |
| CCT / USDT | Sell | 0.01% | 0.01% |
Please consider spread when trading.
What Are Maker and Taker:
- Taker (Takers remove liquidity by fulfilling open orders on the exchange):
When you place an order that trades immediately before going on the order book, you are a taker. This is regardless of whether you partially or fully fulfill an order.
Trades from market orders are always takers, as market orders never go on the order book. These trades are "taking" volume off of the order book, and therefore are taker trades.
- Maker (Makers provide liquidity to exchange and create a market for a token):
When you place an order that goes on the order book partially or fully (such as a limit order placed via the trading screen), any subsequent trades coming from that order will be maker trades.
These orders add volume to the order book, helping to make the market, and are therefore termed maker for any subsequent trades.
2. Withdraw fees.
| Currency | Fee |
|---|---|
| BTC | 0.0003 BTC |
| LTC | 0.003 LTC |
| DOGE | 50 DOGE |
| USDT | 10 USDT |
| ETH | 0.003 ETH |
| XRP | 10 XRP |
| CCT | 1 CCT |
| BCH | 0.04 BCH |
| MEGA | 0.00001 MEGA |
The commission is taken into account when calculating the final payment, it is debited instantly during the payment. Thus, when withdrawing 1000USDT with a commission of 0.1% (for example), you will receive 999USDT excluding the gas fee.
3. P2P fees.
| Currency | Taker | Maker |
|---|---|---|
| BTC | 0% | 0% |
| LTC | 0% | 0% |
| DOGE | 0% | 0% |
| USDT | 0% | 0% |
| ETH | 0% | 0% |
| XRP | 0% | 0% |
| CCT | 0% | 0% |
| BCH | 0% | 0% |
| MEGA | 0% | 0% |
What Are Maker and Taker:
- Maker is a user who posts P2P buy/sell advertisements to offer trades.
- Taker is a user who places a bid on P2P buy/sell advertisements.
4. Exchange fees.
Spread – 0.02%
We do not charge any fees on exchange trades. However, there will be a spread (if you are buying, our prices will be above the market price. If you are selling, our price will be below the market price).